
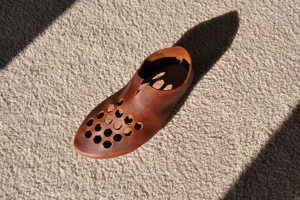
Beekeeper's Shoes
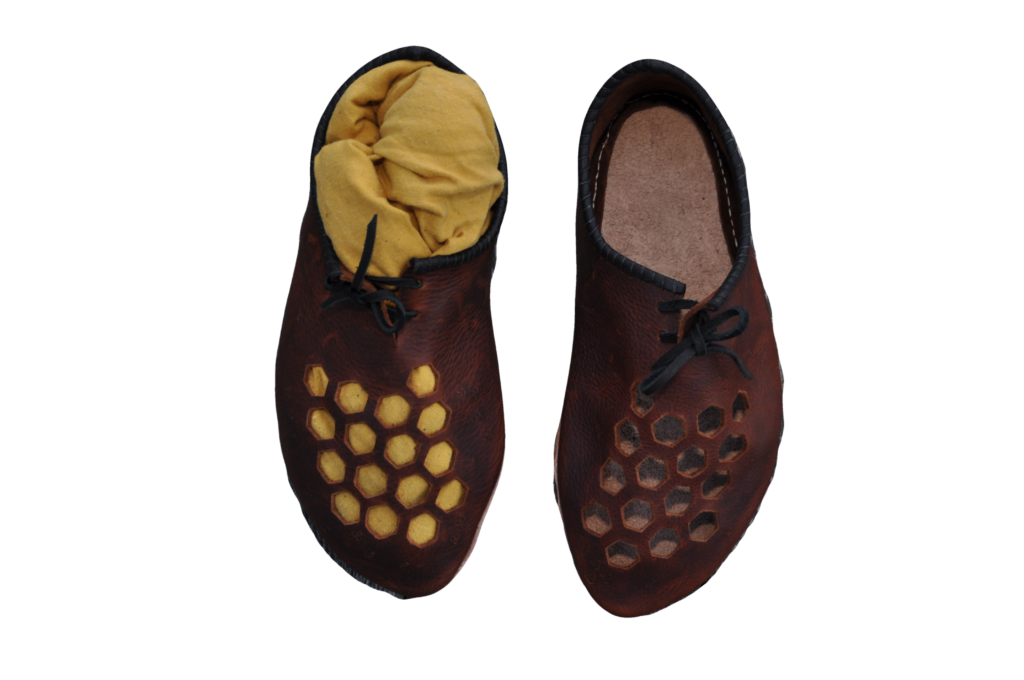
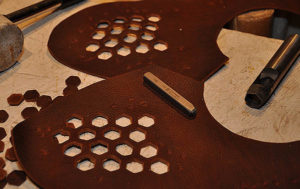
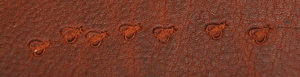
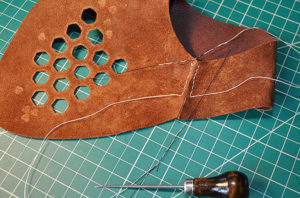
Many medieval shoes have openwork and stamped designs, some of which is rather elaborate. In the spirit of that work, this pair of shoes incorporates a series of hexagonal cut-outs made with a stamp cutter, as well as impressed stamps of bees. Because this pair of shoes is being made for the Æthelmearc Arts & Sciences Championships, I will use waxed ends and real linen thread, which I'll wax manually, when making them.
Several Firsts:
- Brown Kodiak leather
- Openwork design
- Waxed ends for upper/sole stitching
- Manually waxed linen thread for for upper/sole stitching
- Re-use of a pair of waxed ends for uppers' side seams
- Topband on a 14th-century shoe
- Waxed ends and linen thread to attach topband
- Topband attached via binding stitch, not saddle stitch
The leather chosen for these shoes came from Tandy (Kodiak tan), which I chose because the Kodiak black used in my first few projects turned out to be easy to work with, especially when stitching the sides of the uppers together. I had hoped to get black, but alas, none was in stock. Apparently this leather is "oil tanned" and post-purchase research shows that it's not period, although it may help against weather. It has more of an oily feel than the black Kodiak used previously and seems thinner.
This pair takes me back to using boar's bristles after a long lapse and reliance on metal needles and synthetic string. To refresh, I rewatched VIDEO and this time noticed how the counter-twist is properly done. For the first time, my waxed ends not only lasted the entire seam, then lasted two entire seams! After completing the first, and because I didn't want to make another pair for such short work, I just used the same pair again. I put one through the two holes in the second shoe, then tied them together on one side of the seam and them completed the seam with the same pair of waxed ends. There's a new tiny knot at the top, but it's barely noticeable and should not prove annoying to the wearer.
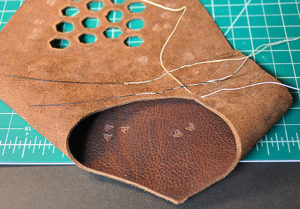
Attaching the soles to the uppers with waxed ends is a first, as is using real linen that has been manually waxed to a length of four arm-spans. The first waxed end gave out after 14cm / 25 stitches after the attachment section had just caught too many times and caused it to creep up and bunch, despite numerous manual re-smoothing.
As for using the manually waxed linen thread and waxed ends over a much longer time: the thread often catches, it's not at all as easy to work with as synthetic. This difficulty seems to arise either from lumps in the thread, or uneven waxing, or the use of coad for the whole string rather than beeswax. The other shoe will use beeswax except for the waxed end itself. Using the waxed ends is much easier on the wrists and forearms, however, because there's no need to grab, pull, and twist the metal needles - just stick the bristle through and pull. On the other hand, it's necessary to punch the awl from both directions in order to ensure a hole large enough for the bristle / thread interface to pull through without catching. On the other, other hand, the strings are sticky enough that they frequently grab each other when touching; also, the bristles will catch on the string and cause tangles unless their long, thin ends are cut off. Also, natural linen thread breaks substantially easier than synthetic; on the first shoe of this pair, the string broke about 3/4 of the way through the project. It's easy enough to tie off and keep going, but the weaker string means less pulling on the stitches to close them, so the seam won't be as tight.
As mentioned above, the second shoe was made with shorter lengths of thread, and they were waxed with pure beeswax. There was definitely less catching from one thread to the other, but it's not clear whether it was the wax, or simply shorter strings, or both. But the lack of catching and the shorter lengths made up for the extra time needed to make an extra pair of waxed ends. One pair had enough remainer that it may work for the side seam in the next pair of shoes.
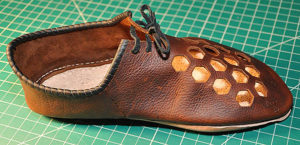
Next up: the top band. According to Grew, this would most likely be a rather thin band of leather, attached with a binding stich (looping over the top of the band), which results in a scallop shape to the leather. My other topbands have all used saddle stitches to attach them, so they may not be period-correct. We'll see how this looks. Black linen thread will be used via waxed ends.
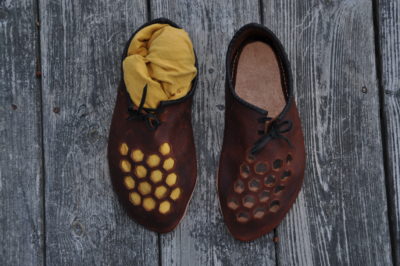
These shoes were displayed at the Æthelmearc Arts & Sciences Championships, Oct. 28, 2017 (see documentation for more information). In order to best show off the openwork, a plastic model foot enclosed in a small yellow sock was inserted into the shoe. The foot was purchased on eBay and the sock on Amazon specifically for this purpose. The plastic foot may also be useful for holding the shape of future drying shoes, although it's rather small and will likely suit only children's shoes for that purpose.
Last updated April 18, 2018.