To-date all of my shoes have been made without the use of lasts. The uppers have been sewn to the soles on a flat working surface and/or my lap. This method appears to work well enough, but it's time to experiment with lasts and learn firsthand about making and using them to construct shoes.
Although making lasts was a separate trade [cite], it seems like a good idea to have a better understanding of how to make and use them rather than continue my current ways that don't incorporate them. If this process turns out to be too difficult for me, or simply not worth the time, that method remains viable. Using lasts would mean more work initially, but perhaps less during stitching, and definitely less if making more than one pair for any given person. It's not likely a worthwhile endeavour for growing children.
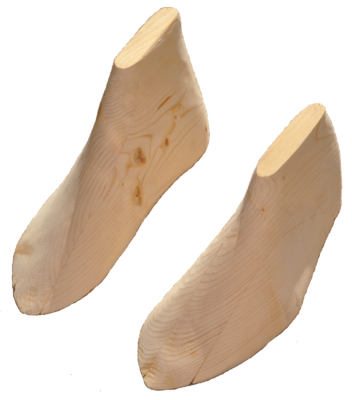
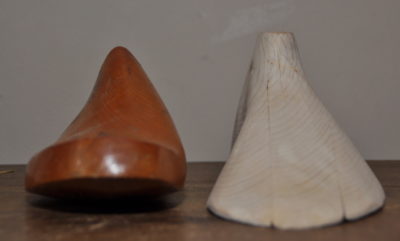
Medieval shoemakers used lasts, although it's often not clear when or how, based on surviving archaeological evidence. See Carlson's web site for information on last finds and how to make a last (but note that my tools differ greatly from his). For purposes of this experiment, we'll be creating a moderately pointed last that might be the right form for the early 14th century.
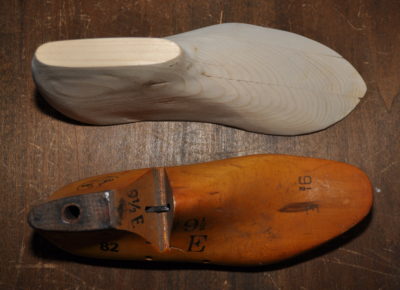
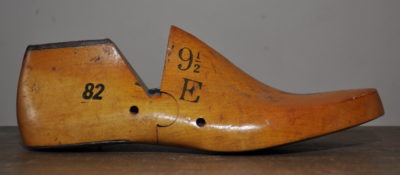
It should be noted that metal lasts went out with the Romans but also served post-period. They are particularly useful when applying hobnails because they turn the nails back into the sole as they are pounded through the leather. Hobnails are also not period, so it's not surprising that metal lasts and hobnails have similar appearances in history.
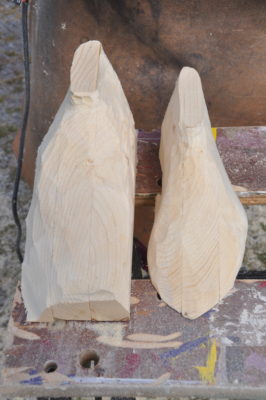
Lasts were made out of hardwood, especially beech, so that they would last a long time. Many lasts have been found in archaeological deposits, but not as many as one might expect. Most likely the lack of lasts results from their handy use as firewood when they became too worn or damaged to be useful in their original purpose.
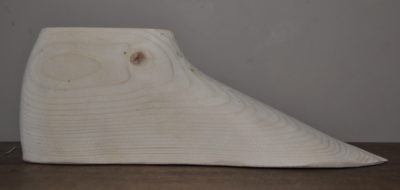
In the interest of saving time, I shall use modern power tools to make my lasts (angle grinder with a Kutzall wood sculpting disc), followed with a power sander. In the interest of saving money, at least until I've learned more about how to get the right shape, I shall use modern pine boards glued together rather than a period-correct block of hardwood such as beech [cite]. This soft wood will be easier to work but may not serve to make many shoes.
Steps:
- Glue three 2x8" one-foot-long pine boards together. I used modern wood glue.
- Screw a 2x4" board on the bottom as a place for clamping the above whilst working on it.
- Draw the foot/ankle plan and profile on wood.
- Use an angle grinder with Kutzall very coarse disc to sculpt and remove wood. (Note that this is a dangerous process. Wear safety gear, including dust mask, eye protection, ear protection, and apron. Practice on scraps first. The Kutzall disc can remove a lot of wood very quickly. It does not make sawdust - it makes wood powder. It is best done outside.)
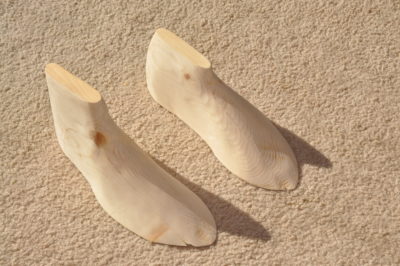
- Once happy with the shape, sand it smooth.
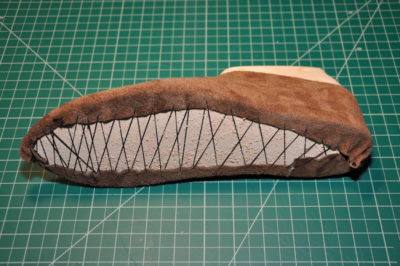
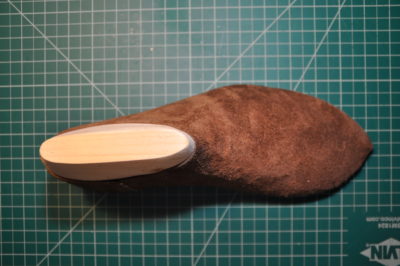
To use a last, the shoemaker holds it upside down and holds the sole against its bottom, with the flesh side upward. The upper, having been wetted, is then stretched into place over the last and sole such that a margin of leather extends beyond the edge of the wood and overlaps the sole. This is called the lasting margin, and it gets folded over and has a zig-zag of thread run through it, back and forth across the last, pulling it tight from every direction.
Once the wet leather upper has dried, the lasting margin is cut away and the shoemaker stitches the upper to the sole. Once fully stitched, the shoe can be removed from the last and then turned.
Although I rough-cut the lasts in September, 2018, I did not smooth them and use them to make shoes until February, 2019.
Results
Test #1: for a very quick-and-dirty test of the lasts, I used very thin, cheap leather for uppers and standard 9-10 oz. sole leather. On one of the shoes my stitching was too shallow so the sole and upper parted during turning. Otherwise, they fit very well. The thin leather is very stretchy. I turned the shoes dry.
Test #2: using substantially thicker upper leather, my first shoe came out with many altogether missed stitches. I just could not tell during stitching whether or not the awl was pushing through the upper as well as the sole. Apparently in many cases it was just the upper. I need to change the angle of the awl, it seems, to be sure to make a hole through the leather.
Clearly I need more practice with using lasts and plan to get back to them as soon as time allows.
Last updated April 10, 2019.